- Home
- Anti-Aging Makeup
Face Makeup for Women Over 40: How to Get a Softer, Smoother Finish
If your makeup used to make your skin look better — and now it does the opposite — you’re not imagining it.
Over 40, foundation becomes less forgiving, and the same products and techniques can start looking dry, patchy, or too noticeable.
This face makeup hub focuses on the base — skin tints, tinted moisturizers, foundation finishes, and mineral options — along with the application and skin prep tweaks that help makeup apply more evenly and settle less into lines.
No complicated routines. Just small changes in how you prep your skin, where you apply makeup, how much you use, and how you blend — so your makeup looks softer and more natural again.
 Face makeup doesn’t need to be complicated — lighter layers usually look best on textured or drier skin.
What you'll find here:
- How to stop foundation from looking dry, patchy, or cakey
- Where to place makeup so it looks more even (without covering your whole face)
- How to choose the right type of base (skin tint, tinted moisturizer, or foundation)
- The blending trick that makes foundation look smoother
- Simple prep steps that help makeup apply better tomorrow
Start Here: The 60-second face makeup routine I use
 My quick placement guide: inner eye corners, sides of the nose, and lower cheeks — then blend outward. These are areas with the most discoloration for me.
Most days, I keep my makeup light. I just want to look a little more awake, a little lifted, and still very natural.
Where I place foundation on my face for a softer, more natural finish over 40
My quick placement guide: inner eye corners, sides of the nose, and lower cheeks — then blend outward. These are the areas with the most discoloration for me.
I keep my base simple and focused — just enough to even out skin without piling on product. This isn’t about perfect makeup. It’s about using less product, placing it more carefully, and stopping before things look overdone.
I apply a sheer base only where I need it — not all over my face.
My quick placement guide (how I apply base makeup):
- Inner eye corners — I place a small amount here first. This is where darkness and uneven tone tend to show up most for me.
- Sides of the nose — From the inner corners, I bring the product straight down the sides of my nose, where i also have some redness.
- Lower cheek area (near the mouth) — I lightly spread what’s left across the lower cheek area, to cover any discoloration.
- Blend outward — From there, I blend outward lightly and stop once the skin looks more even — not fully covered.
- Keep the finish soft — The goal is a soft, natural finish — nothing heavy or overly matte.
Why this works (and how to adjust it)
This approach focuses coverage where uneven tone shows most, while keeping the rest of the face lighter. That’s what helps makeup look soft instead of heavy.
If discoloration shows up in different areas for you, adjust the placement to suit your skin. The goal isn’t copying exact spots — it’s using less product, placed where your skin actually needs it.
How to choose foundation that still looks like your skin
Are you frustrated with how your makeup looks?
Over 40, most makeup issues start with base products. The problem usually isn’t technique — it’s using formulas that are heavier or drier than your skin wants now.
When I’m choosing a foundation, I don’t ask which one covers the most anymore. I ask myself:
“When I apply this lightly, does my skin still look even, natural, and clean?”
If the answer is yes, it’s usually the right base — even if it doesn’t promise full coverage.
Below are the base options I reach for most — and when each one tends to work best.
Skin tint (My favorite “Looks Like Skin” option)
If I want my skin to look like skin — just more even — a skin tint is usually my first choice. It gives light coverage without leaving a visible layer on the skin on top of or emphasizing fine lines.
Skin tints work especially well if:
- Your skin leans dry or normal
- You don’t want to cover freckles or natural variation
- You prefer a fresh, natural finish over full coverage
Learn more: What Is a Skin Tint
BB cream (when you want warmth + light coverage)
BB cream sits somewhere between a skin tint and a light foundation. I like it when my skin looks a little washed out or freckly and I want warmth and a smoother tone — without full coverage.
I don’t rely on BB cream to replace skincare, but as a makeup step, it can even out tone and make skin look healthier with very little effort. Link line:
Learn more: What Is BB Cream (Benefits & Tips for Older Skin)
Tinted moisturizer vs foundation (when each one looks better)
This is where a lot of people get stuck — and there’s no one “right” answer.
In general:
- Tinted moisturizer tends to look better when skin feels dry or textured
- Foundation works best when applied lightly and only where needed
The key is not using either one all over the face by default. Most of us only need coverage in certain areas, not everywhere.
Learn more: Foundation vs Tinted Moisturizer
Mineral makeup (great when you want control over coverage)
Mineral makeup can be a good option if you like building coverage slowly or mixing products to get the finish you want.
I like mineral formulas because:
- You can use very small amounts
- Coverage is adjustable
- They often feel lighter on the skin
Used sparingly — a small amount tapped on, not layered mineral makeup can look soft and natural instead of powdery.
Learn more: Organic & Mineral Makeup for Aging Skin
How to apply foundation so it looks smoother (without adding more)
When makeup starts looking heavy or settles into lines, most of us try to fix it by adding more — and that usually backfires.
What actually helps is how you apply what you’re already using. Here are a few easy but effective tips about application,
My go-to blending trick: press + smooth, not swipe

One of the easiest ways I’ve found to make base makeup look smoother is switching how I blend.
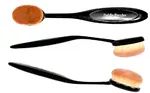
Instead of swiping or buffing aggressively, I use a paddle-style brush to:
- Press product into the skin
- Smooth lightly over areas with texture
- Avoid dragging makeup across fine lines
It’s a small change, but it makes a noticeable difference.
Learn more: Paddle Foundation Brush (How I Use It)
The “less product, better placement” rule
This rule alone fixes a lot of makeup issues.
I focus coverage:
- In the center of the face (around the nose, inner cheeks, chin)
- Where redness or uneven tone actually exists
Then I blend outward and stop. Most faces don’t need full coverage everywhere, especially around the eyes. Applying strategically and only where needed keeps makeup from settling and looking heavy.
If you’re doing all of this and foundation still looks patchy or settles into lines, the issue is usually skin prep — not more makeup.
How skin prep affects how foundation looks
If your foundation suddenly clings, looks patchy, or settles into fine lines, the problem often isn’t the makeup itself. It’s what’s happening on the skin before anything goes on.
When skin is smoother, calm, and properly hydrated, base makeup spreads more evenly and needs less product to look good.
These aren’t extra steps — they’re the reason makeup behaves better.
Gentle exfoliation (why makeup looks smoother after)
If foundation grabs onto dry patches or looks uneven no matter how lightly you apply it, gentle exfoliation can help.
Removing surface buildup allows makeup to sit on skin instead of catching on texture. This usually means you need less coverage — not more — to get an even look.
Learn more: Benefits of Gentle Exfoliation Over 40
Dermaplaning (optional, but helpful for some skin types)
Dermaplaning isn’t exfoliation in the traditional sense. It mainly removes fine facial hair and surface buildup. This is one of my favorite and simple tips for baby smooth skin!
As we get older, many women notice changes in facial hair and skin texture — sometimes related to normal hormonal shifts, sometimes just how skin evolves with age.
Dermaplaning is optional, but for some women, it helps foundation and skin tints glide on more smoothly and look less textured when applied.
Learn more: At-Home Dermaplaning
Moisturizer timing (why rushing this step makes makeup look worse)
Even the best foundation won’t look right on under-hydrated skin.
Letting moisturizer fully absorb for a few minutes before applying makeup helps base products spread more evenly and settle less into fine lines. Applying foundation too soon — while skin is still slippery or damp — often leads to patchiness or separation later.
This step alone fixes more makeup issues than most people realize.
Learn more: Antioxidant Facial Moisturizers for Skin Over 40
Makeup removal (yes, this affects tomorrow’s makeup)
If makeup never seems to sit right — even when you use less — your removal step may be part of the problem.
Makeup wipes are convenient, but they often leave residue behind and can dry out the skin over time. That leftover film can make foundation cling, settle into lines, or look patchy the next morning.
When skin is properly cleaned and calm at night, makeup usually applies more smoothly the next day — with less product.
Learn more: Why makeup wipes are a poor choice for mature skin
Why these skin prep tips work together:
When skin is smooth, hydrated, and calm, makeup doesn’t have to work as hard. That’s when lighter application actually looks better — and foundation stops fighting your face.
Takeaway
Makeup over 40 doesn’t work better when you add more — it works better when you’re more selective and your skin is prepped.
A lighter base, softer placement, and a few small technique changes can make your makeup look smoother, fresher, and more natural without trying to hide your skin. Most days, that means choosing the right formula, using less product, and letting your skin do some of the work.
If one area on this page stood out to you — skin tints, mineral makeup, brush technique, or prep — start there. You don’t need to change everything at once. One adjustment is often enough to see a difference.
Makeup should support how your skin looks as it changes, not fight it. When it does, everything feels easier — and a lot more like you.
ABZ Note: I keep this page updated with what actually works for how my skin behaves now — no trends, just real tweaks that make makeup sit better.
You might like these
Organic Makeup for Mature Sensitive Skin
Try Organic makeup foundation tester kit before you buy. Pure, good mineral makeup can make skin look younger.
How to Look Less Tired: At-Home Tips for a Brighter, Youthful Look
How to look less tired with these at-home tips. From skincare routines to makeup tricks, try ways to brighten your skin, reduce puffiness, and look refreshed.
Why a Paddle Foundation Brush: Best Uses for Older or Aging Skin
A paddle makeup brush helps hide wrinkles, lines, and large pores. See why.


Want More?
I share quick routines, beauty tweaks, and what’s working for me — straight to your inbox. Join the Club and get this free Cheek Shaper Video.


About the Author:
Linda Robison is an anti-aging advisor for women over 40, sharing natural methods, facial exercises, and beauty routines she's personally tested over the years for smoother, firmer-looking skin. She spent nearly 15 years as an Anti-Aging Health Advisor at the Life Extension Foundation and has been testing facial anti-aging techniques for over 30 years, including training in Carolyn’s Facial Fitness. Her tips have been featured in GB News and Beauty Box Magazine. You can also view her background on LinkedIn. For more everyday tips follow along on Pinterest.
Found this helpful? Tap the 💙 in the bottom right corner
SHARE OR SAVE THIS 💗
SHARE OR SAVE FOR LATER:
A Quick Note: I personally create the content on this site but sometimes use AI tools to help with writing and image creation. I do my best to keep everything accurate, helpful, and especially true to my own experience. While some images may be AI-generated, my before-and-after photos are my own. As always, I recommend double-checking anything important, since information can change or be interpreted differently.

Anti-Aging Beauty Zone (ABZ): Small Changes, Big Results!
ALL CONTENT COPYRIGHT© 2013-
ALL RIGHTS RESERVED REGARDLESS OF LINKS OR ATTRIBUTIONS
HOME DISCLAIMER
PRIVACY / AFFILIATE POLICY
SITEMAP CONTACT
ALL CONTENT COPYRIGHT© 2013-
ALL RIGHTS RESERVED
REGARDLESS OF LINKS OR ATTRIBUTIONS